One of the exciting things about being back in the UK is being able to go and forage once again! We did try this in Brunei, managing to gather some mangos before the local monkeys got to them, but foraging in the jungle was always a little risky in my mind, so we didn't really dare.
But now is the season for one of the most satisfying foraging of the year, nettles. We have a field ajoining our garden than is currently full of young nettles, and as they need clearing anyway we thought we'd kill the proverbial two birds with one stone and eat some of the ones we cleared. OK, I say 'we', but this was Rob's job - he picked, washed and cooked them with delicious results.
We had made nettle soup before (as blogged about previously) but this time Rob used a Hugh Fearnley-Whittingstall recipe, found on guardian online. Personally I wouldn't have bothered with a recipe, but he wanted to so I didn't interfere!
It was delicious anyway. The nettles just taste 'green', but healthy and nutritious, rather like spinach I suppose. Ted enjoyed it too!
Showing posts with label foraging. Show all posts
Thursday, 2 May 2013
Sunday, 20 June 2010
Elderflower Cordial
I made a batch of Elderflower Cordial last year and we still have a tub of it in the freezer so I didn't think I'd bother making another batch this Summer, seeing as we're trying to empty the freezer before we go to Brunei. But then I noticed that there were several elder trees growing in the vicinity of the school... I decided to indoctrinate my class into the delights of foraging!!
To reassure, we did have a long chat about the possible dangers of eating things 'from the wild' - berries, etc - and how we should always check with an adult before picking and eating anything from the hedgerows, but talk over, we set out to pick the requisite 40 heads of elderflowers needed for the cordial.
Armed with scissors the task was soon accomplished...
And back in school we soon had ourselves a batch of cordial infusing, and a delightfully fragrant classroom!
We did shake the elderflower heads to remove as many bugs as possible, but you're not meant to rinse the flowers as you then wash all the pollen away. As you can see, there were still plenty of teeny bugs floating around in the bowl. You can only imagine the excitement this caused!!
The cordial has now been strained (no more bugs!) and sampled enthusiastically by the whole class. I'd guess there was a 75% approval rating, which I didn't think was bad, considering how fussy 6-8 year-olds can be. We still have nearly 2 litres of undiluted cordial left though... I'm pondering making up jugs of it and selling it at the school gate after school one day this week.
Elderflower Cordial
40 heads of elderflowers
2 lemons, sliced
3 1/4 lb granulated sugar
3oz citric acid (from a chemist)
3 pints boiling water
Mix all the ingredients in a clean container, cover and leave for up to 5 days. Strain, dilute with water and drink.
To reassure, we did have a long chat about the possible dangers of eating things 'from the wild' - berries, etc - and how we should always check with an adult before picking and eating anything from the hedgerows, but talk over, we set out to pick the requisite 40 heads of elderflowers needed for the cordial.
Armed with scissors the task was soon accomplished...
And back in school we soon had ourselves a batch of cordial infusing, and a delightfully fragrant classroom!
We did shake the elderflower heads to remove as many bugs as possible, but you're not meant to rinse the flowers as you then wash all the pollen away. As you can see, there were still plenty of teeny bugs floating around in the bowl. You can only imagine the excitement this caused!!
The cordial has now been strained (no more bugs!) and sampled enthusiastically by the whole class. I'd guess there was a 75% approval rating, which I didn't think was bad, considering how fussy 6-8 year-olds can be. We still have nearly 2 litres of undiluted cordial left though... I'm pondering making up jugs of it and selling it at the school gate after school one day this week.
Elderflower Cordial
40 heads of elderflowers
2 lemons, sliced
3 1/4 lb granulated sugar
3oz citric acid (from a chemist)
3 pints boiling water
Mix all the ingredients in a clean container, cover and leave for up to 5 days. Strain, dilute with water and drink.
Sunday, 18 April 2010
Nettle Soup
When I tell people that I enjoy foraging for food, I am often asked if I have ever made Nettle Soup. It seems to embody the very idea of free food from the countryside. But the answer has always been no. Last year I fully intended to make some, but left it too late - for the best results you need to gather the nettles when the leaves are young and tender - about now is great.
This year the unseasonably sunny weather kicked me into action, so Rob and I set off this afternoon, armed with gardening gloves, to forage for some nettles.
They're not exactly hard to find! Once you start looking in any hedgerow or field boundary you soon find plenty - I think they're so common that I often don't even notice them. We chose a patch that wasn't too close to any well-used footpaths (hoping to avoid nettles fertilised by dog-wee!) and got picking.
The gloves were, of course, invaluable. Had I thought ahead I would have also worn boots but set off in sandals, only to find my ankle got stung. But one sting from all those nettle-tops didn't seem too much of a sacrifice (although I had forgotten how much it hurts!)
When picking nettles, you need to pinch out the tops, so you end up collecting the 4 smallest leaves from each plant. It's immensely satisfying, as foraging usually is, but this time with the added bonus of being able to feel that in some tiny way you're keeping the spread of these pesky plants in check!
We soon managed to gather the requisite half-carrier-bag-full needed, and rinsed them well in cold water (wearing washing-up gloves this time!). They're really quite pretty leaves when you look closely at them - but it's those fine hairs that cause the stings. Luckily boiling water neutralises them within seconds.
I found many recipes online, but ended up making up the soup using what I had, including a handful of the wild garlic leaves collected yesterday, making it a well-foraged soup! This is what I did:
Nettle Soup
Chop one large onion and one large potato (unpeeled) and gently soften in a large pan (use olive oil or butter).
Add half a pan full of stock (I used chicken) and bring to the boil, simmering until the potatoes are tender.
Add the nettles (half a bag full) and a large handful of wild garlic (or saute a chopped clove of garlic with the onion and potato at the beginning of the process), stir, cover and bring back to the boil for 3 or 4 minutes. The leaves will darken a little and wilt down, much as spinach does.
Blend the soup until smooth (I used a stick-blender), and stand back and admire the vibrant green colour! Sample and season with salt and pepper as needed; I found that it needed quite a lot of both.
When I reheat it I will stir a little cream through each bowl just before serving, to make it a little more luxurious. I have sampled some already of course... the nettles don't have a strong flavour, it just tastes quite 'vegetabley' to me, but delicious all the same - and virtuously healthy too!
Whilst foraging, we were passed by a couple out on a walk who were intrigued by what we were doing. I think foraging for food appears rather eccentric to those who don't do it..! The woman said that she had once had Nettle Beer... could this be our next project?!
This year the unseasonably sunny weather kicked me into action, so Rob and I set off this afternoon, armed with gardening gloves, to forage for some nettles.
They're not exactly hard to find! Once you start looking in any hedgerow or field boundary you soon find plenty - I think they're so common that I often don't even notice them. We chose a patch that wasn't too close to any well-used footpaths (hoping to avoid nettles fertilised by dog-wee!) and got picking.
The gloves were, of course, invaluable. Had I thought ahead I would have also worn boots but set off in sandals, only to find my ankle got stung. But one sting from all those nettle-tops didn't seem too much of a sacrifice (although I had forgotten how much it hurts!)
When picking nettles, you need to pinch out the tops, so you end up collecting the 4 smallest leaves from each plant. It's immensely satisfying, as foraging usually is, but this time with the added bonus of being able to feel that in some tiny way you're keeping the spread of these pesky plants in check!
We soon managed to gather the requisite half-carrier-bag-full needed, and rinsed them well in cold water (wearing washing-up gloves this time!). They're really quite pretty leaves when you look closely at them - but it's those fine hairs that cause the stings. Luckily boiling water neutralises them within seconds.
I found many recipes online, but ended up making up the soup using what I had, including a handful of the wild garlic leaves collected yesterday, making it a well-foraged soup! This is what I did:
Nettle Soup
Chop one large onion and one large potato (unpeeled) and gently soften in a large pan (use olive oil or butter).
Add half a pan full of stock (I used chicken) and bring to the boil, simmering until the potatoes are tender.
Add the nettles (half a bag full) and a large handful of wild garlic (or saute a chopped clove of garlic with the onion and potato at the beginning of the process), stir, cover and bring back to the boil for 3 or 4 minutes. The leaves will darken a little and wilt down, much as spinach does.
Blend the soup until smooth (I used a stick-blender), and stand back and admire the vibrant green colour! Sample and season with salt and pepper as needed; I found that it needed quite a lot of both.
When I reheat it I will stir a little cream through each bowl just before serving, to make it a little more luxurious. I have sampled some already of course... the nettles don't have a strong flavour, it just tastes quite 'vegetabley' to me, but delicious all the same - and virtuously healthy too!
Whilst foraging, we were passed by a couple out on a walk who were intrigued by what we were doing. I think foraging for food appears rather eccentric to those who don't do it..! The woman said that she had once had Nettle Beer... could this be our next project?!
Wild Garlic Tips
For those of you who might be interested in sniffing out some wild garlic yourself, I have a few hints and tips. I have found 3 patches of it in my local area. All 3 are in deciduous woodland, and 2 of the 3 in places where bluebells are also found.
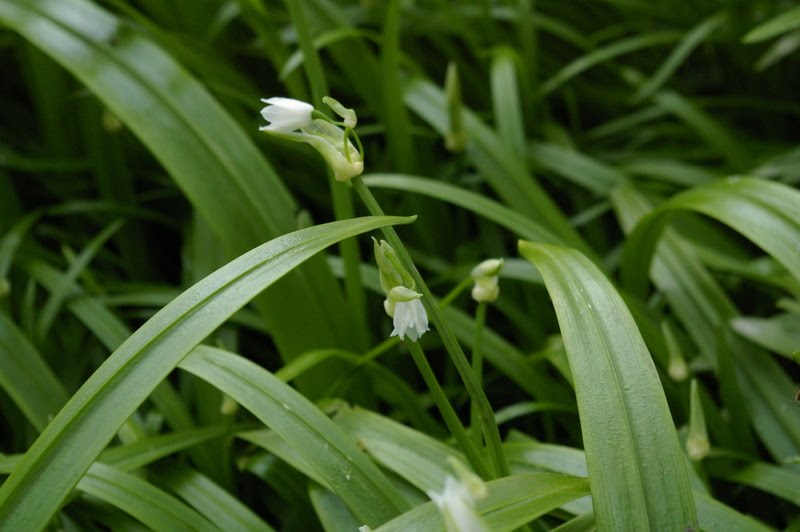
I have noticed that there seem to be 2 different varieties of wild garlic... The one with long thin leaves that I blogged about recently:
And one with much wider leaves, which I think is possibly the more common variety:
Here's Rob collecting from the vast patch of them that we stumbled across on a walk yesterday. From my nibblings, I think that the wider-leaved garlic has a stronger flavour... Rob was certainly complaining about my garlic-breath for hours after I ate a mere half a leaf yesterday!
Both varieties have small white flowers, and the leaves begin to turn yellow and die back soon after the flowers have blossomed. There's quite a short window of opportunity for gathering the leaves to eat.
We filled our sandwich box with them, and I have made another batch of pesto, as well as using them as an ingredient in a soup.
Here is a wider-angle view of the patch, to give you an idea of the kind of woodland in which you need to search:
In my experience you sometimes smell the leaves before you see them. I did notice a few plants growing individually in the woods, but mostly I think the plant seems to grow close together with many others, creating these dense areas of garlicky leaves.
Happy Garlic-Hunting!
I have noticed that there seem to be 2 different varieties of wild garlic... The one with long thin leaves that I blogged about recently:
And one with much wider leaves, which I think is possibly the more common variety:
Here's Rob collecting from the vast patch of them that we stumbled across on a walk yesterday. From my nibblings, I think that the wider-leaved garlic has a stronger flavour... Rob was certainly complaining about my garlic-breath for hours after I ate a mere half a leaf yesterday!
Both varieties have small white flowers, and the leaves begin to turn yellow and die back soon after the flowers have blossomed. There's quite a short window of opportunity for gathering the leaves to eat.
We filled our sandwich box with them, and I have made another batch of pesto, as well as using them as an ingredient in a soup.
Here is a wider-angle view of the patch, to give you an idea of the kind of woodland in which you need to search:
In my experience you sometimes smell the leaves before you see them. I did notice a few plants growing individually in the woods, but mostly I think the plant seems to grow close together with many others, creating these dense areas of garlicky leaves.
Happy Garlic-Hunting!
Saturday, 10 April 2010
Wild Garlic Pesto
Winter has been a lean period for foraging - but one that has seen us enjoying the fruits of our labours. For months now we have been eating homemade jams, apple chutney, hedgerow jelly, spiced damson sauce and chili jelly, to name but a few. It's been great, but I've been keen to get out and find more wild food.
Last week I struck lucky. We were returning from a walk and within 5 minutes' of home I suddenly smelt the unmistakable scent of wild garlic. I first used this last year, and realised that the season is all-too-brief - the leaves quickly turn yellow, so need to be grabbed when fresh and green. I raced home to get a bag, then came straight back out to gather some leaves.
Last year I had eaten them as part of a salad, and also stirred them through cooked pasta along with some homemade walnut pesto, but I wanted to try and make them a bit more of a feature in their own right this time.
I decided to turn them into a pesto. Loosely following a recipe that I found in one of Hugh Fearnley-Whittingstall's books, I blended the garlic leaves - 2 large handfuls - with about 50g of toasted pine-nuts and about the same amount of grated Parmesan. I drizzled in EVOO to bring it all together, before seasoning with salt and pepper.
OK, it might look a little like alien-goo, but the garlicky smell wafting up from it was wonderful. We ate it stirred through cooked pasta and topped with crispy bacon and shaved Parmesan. Delicious.
Last week I struck lucky. We were returning from a walk and within 5 minutes' of home I suddenly smelt the unmistakable scent of wild garlic. I first used this last year, and realised that the season is all-too-brief - the leaves quickly turn yellow, so need to be grabbed when fresh and green. I raced home to get a bag, then came straight back out to gather some leaves.
Last year I had eaten them as part of a salad, and also stirred them through cooked pasta along with some homemade walnut pesto, but I wanted to try and make them a bit more of a feature in their own right this time.
I decided to turn them into a pesto. Loosely following a recipe that I found in one of Hugh Fearnley-Whittingstall's books, I blended the garlic leaves - 2 large handfuls - with about 50g of toasted pine-nuts and about the same amount of grated Parmesan. I drizzled in EVOO to bring it all together, before seasoning with salt and pepper.
OK, it might look a little like alien-goo, but the garlicky smell wafting up from it was wonderful. We ate it stirred through cooked pasta and topped with crispy bacon and shaved Parmesan. Delicious.
I'm currently away on holiday (in Shropshire - about which more in another post) but I'm really hoping that that patch of wild garlic is still there when we return. I'd like to forage further!
Monday, 23 November 2009
In Defence of Foraging
Last week I found myself in Waitrose in Berkhamsted and bought a few little excitements, not least being a copy of the excellent 'Waitrose Food Illustrated' magazine which, as ever, is full of mouth-watering recipes and interesting articles. (Incidentally, all the recipes from the magazine can be found online here, which is a fantastic resource for cooks looking for inspiration).
One article in this month's magazine really caught my eye. Written by Tim Hayward and entitled 'Fruits of the Forage?' it is a scathing attack on what he sees as the modern middle class obsession of foraging for food.
Foraging appeals to the middle classes at a visceral level he begins. It must be the sense of woolly, green wellbeing, plus the knowledge that they're distinguished from the masses.
He goes on to attack the Yummy Mummy (how I detest that phrase!) he recently spotted picking nettles along the Regent's Canal towpath in a posh area of London, and then the Boden-clad locusts... stripping our endangered hedgerows in the countryside. (Note to Waitrose: way to go, attacking your core consumer base of Boden-clad yummy mummies..!)
Now whilst I tend to agree that anyone foraging in a city close to the bars and restaurants of a busy high street possibly deserves all they get (Hayward informed the hapless woman that the previous night he had witnessed a group of drunken city-boys pissing in the very nettles she was lovingly picking for soup) I found the tone of the article pretty patronising... not to mention wrong!
I enjoy foraging because I think that it is a way of getting back to more traditional ways of eating. Our 21st century norm of plastic-encased, imported food means we have moved away from the idea of seasonality in our diets, and I love the idea of eating what is in season.
I can't deny that I also like the idea of getting food for free - but I am under no illusion that I am saving a great deal of money... after all, you may spend a happy half hour foraging for nettles for your soup, but when you consider that you will have paid for the other ingredients - potato, stock, milk, seasoning, cream - it's hardly a 'free meal'. (OK, it's a cheap meal, but then most soups are).
But you are saving some money. Buying enough fruit for jam is expensive, so using things like foraged cherries, blackberries and apples make jam and chutney-making a pretty economical option, never mind the fact that it's nice to know exactly what you're eating because, well, you made it yourself. And why on earth, when you live close to the countryside as I do, would you BUY a punnet of blackberries in the supermarket when the hedgerows are full of them?!
It's also a great way of eating things that you would never normally get to eat as they're rarely available to buy. Hayward quotes chef Rowley Leigh saying: The idea of going out, picking wild leaves and saying they're delicious when in reality they have a nasty, feral taste is nonsense. Yes, that would be nonsense, but who could argue that Wild Garlic has a 'nasty, feral taste'?? That's something that can only be foraged. Elderflowers, rosehips, elderberries and crab apples also come in this category, and I'd hate to be without them in my kitchen.
Hayward's story of author Nicholas Evans serving foraged mushrooms (thinking they were chanterelles) to his dinner guests who then all ended up on kidney dialysis for 2 weeks is a salutary tale, but not one that need label all foraging as 'daftness'. Personally I'll leave the fungus-gathering to the experts - I'm happy to just photograph them - but if I made the effort to identify them I'd certainly give it a try.
Yes, there are things that I probably won't bother with again - hawthorn berries, green walnuts (although I have yet to sample either the toxic-looking liqueur or the equally frightening looking pickled walnuts, so maybe I shouldn't judge too hastily...) - but isn't life dull if you don't try new things every now and again? And surely the chance of creating something utterly delicious from foraged treasures is worth the occasional less-than-stellar result.
Friday, 23 October 2009
Chestnuts
We went out for a cycle ride last weekend, taking in some of the Grand Union Canal towpath. As we were hurtling down a long hill into Berkhamsted Rob suddenly screeched to a halt. I immediately suspected some kind of problem - most likely a flat tyre (which seemed destined to happen, as I had forgotten to bring the puncture-repair tools with me...) but thankfully there was a much more pleasant reason for stopping - Chestnuts!
And not just a few. As you can see, the road was covered in them, many squashed to a pulp by the passing cars, but plenty still nestling within their spiky shells.
I love the Spring, I adore the Summer, but Autumn is pretty fantastic too!
And not just a few. As you can see, the road was covered in them, many squashed to a pulp by the passing cars, but plenty still nestling within their spiky shells.
The UK is home to two kinds of chestnut tree, although confusingly they are not related to eachother. The Horse Chestnut produces the conker, inedible to humans but much used by children for playing conkers. The Sweet Chestnut tree was introduced into Britain by the Romans who made much use of its edible seeds. These chestnuts are available to buy for a few months over the winter (often seen as being symbolic of Christmas - 'Chestnuts roasting on an open fire', etc) but those in the shops are usually imported from countries such as Italy. It seems that few people collect their own nowadays, although I suspect this is in part because the chestnuts you might see growing wild here are often tiny, too small to be of much use.
These chestnuts however were a great size, the biggest I'd ever seen here, and we proceeded to fill up our rucksack-pockets with them. Those prickly cases are vicious though, so I soon discovered that the best way to free the nuts was with my feet!
I'm not sure what the people in the passing cars thought of us... I wonder how many people realised what we were collecting?
We had so many that I wondered how on earth we were going to use them all. I had great plans for marrons glaces, chestnut cake, chestnut stuffing, etc, etc...
But you know, sometimes the simplest ways are the best. We have just been roasting them on the glowing embers of the fire, eating them with nothing more than a sprinkling of salt, and drinking a glass of fine English beer while we do so.
I love the Spring, I adore the Summer, but Autumn is pretty fantastic too!
Thursday, 22 October 2009
Happy Apple Day!
This might not look like a particularly happy apple, but believe me I was happy when I found it; and the many others that were sitting in a box on a driveway with a plaintive 'Please help yourself' sign.
I was even happier to put them to use in the kitchen, and today I have made the most of the first day of the half term holiday and used up all the apples that I have collected from the driveways of Buckinghamshire.
My favourite thing to make is Apple Chilli Jelly. It's SO easy, the apples don't even need to be peeled and cored! The recipe I use can be found here, but please note that a chopped red chilli should be added to the apples as they are first boiled (this is mentioned in the comments section below the recipe, but not in the recipe itself). I made a batch of this last year and we have really enjoyed eating it since then. I like it with roast chicken, but it's particularly nice with a plain milky white cheese such as Lancashire, Cheshire or Wensleydale. The pulp is currently suspended in a muslin bag over a bowl as the juice drips out. I will make it into beautiful red-flecked jelly tomorrow.
Whilst that was underway I set to making my first batch of chutney. The recipe is from a much-used, well-battered charity cookbook sold in aid of the Alphington Church (in Exeter, Devon) repair fund. It's one of those lovely fundraising books which is clearly a product of a whole community. I have several such recipe books as I can never resist buying them. In this case, several celebrities had clearly been asked to contribute recipes, and this Apple Chutney recipe is credited to the actress Penelope Keith - who starred, appropriately, in the classic 1970s comedy about self-sufficiency The Good Life! Chutney-making Penelope is clearly a world away from her snobbish character Margot though - this recipe is a winner. So simple, and a perfect way of using up a glut of windfall apples. Although peeling, coring and dicing 4lb of them is not much fun...
I had my annual oh-no-the-pan-isn't-big-enough panic as I piled in the ingredients, but after a short time the apples had cooked down and begun to turn pulpy.
It's also a great way of reusing all those jars which I can't stop myself saving... I use the nicer ones for sweet jams and jellies, but those with the lingering scent of something savoury - olives, capers, curry paste (?!) - I save for chutney figuring that it has such a strong vinegary flavour that it will cover up any other tastes.
The recipe is nothing new, nothing special, but if you want a really good 'basic' chutney then you can't go wrong with it:
Penelope Keith's Apple Chutney
4lb windfall apples, peeled, cored and roughly diced
1lb onions, chopped
1lb sultanas
1 clove garlic, finely chopped
1 pint malt vinegar
1lb soft brown sugar
1tsp ground ginger
1tsp salt
1/2 tsp ground pepper
Put all ingredients into a pan. Bring to the boil and simmer for 3-4 hours until dark brown. (My note - from experience... Keep an eye on it for the last hour as it can stick and burn if left for too long at this point). Pot whilst hot, in sterilised jars.
I hope you are enjoying apple season. Excuse me while I clamber onto my soapbox, but I really really really resent the amount of apples that we import into this country. Apples grow so well in England, and in such an abundance of varieties, that it seems so wrong to buy a bag of them that have been flown half way around the world. I rarely buy apples in fact (as they are so easily available for free!), but whenever I do I carefully check the labels (so often designed it seems so that it's virtually impossible to find the country of origin...) and make sure that they are grown in the UK. I've heard it called a mange-tout moment; you know, when you stand there in the produce section of a supermarket and realise that the small plastic-wrapped packet of veg you are about to throw into your trolley has actually come on a 10-hour flight from Kenya... Well, have an 'apple moment' too! Yes, I buy imported food - I'd find it hard to cook without such things as lemons that we can't grow in this country - but where there's a choice... well, just think about it.
Labels:
apple chilli jelly,
Apple Day,
apples,
chutney,
foraging
Tuesday, 20 October 2009
Rosehip Syrup
Having made Hedgerow Jelly, thus fulfilling a small ambition to use rosehips for a culinary purpose, I had the urge to make further use of these plentiful fruits. The Jelly is gorgeous, but the over-riding flavour is of apples. I wanted to taste the rosehips in their full glory.
Once again I turned to Pam Corbin's fabulous Preserves book, and this time thought I would try Rosehip Syrup. Rich in Vitamins A and C, Rosehip Syrup was a staple drink for generations past. During World War Two members of the public were actually paid to collect rosehips for this syrup, in order that the nation's children could be kept healthy.
The recipe is simplicity itself, although does require some forethought as the rosehip pulp needs to be left overnight to drip.
Rosehip Syrup
Makes about 1.5 litres.
500g rosehips, rinsed, stalks removed
650g granulated sugar
Put 800ml water in a pan and bring to the boil.
Mince the rosehips in a food processor, and add them to the pan of water. Cover and bring back to the boil.
Remove the pan from the heat and allow to stand for 15 minutes.
Pour through a scalded muslin or jelly bag and leave to drip for an hour or so.
Set aside the strained juice.
Bring another 800ml of water to the boil, add the rosehip pulp and repeat the boiling process.
Tip the mixture back into the bag/muslin and this time leave to drip overnight.
The next day discard the rosehip pulp (I added it to our compost bin) and combine both lots of strained juice (which should be about 1 litre) in a large pan.
Add the sugar and heat, stirring until dissolved. Boil for 2-3 minutes, then immediately pour into warm sterilised bottles and secure with a screw-cap or cork.
Use within 4 months.
Pam (for I feel like we can be on first-name terms now!) suggests drinking the syrup mixed with hot water - I'd imagine this to be particularly good as an attempt to ward off the inevitable winter cold - or drizzled neat over rice pudding or pancakes. Co-incidentally my brother-in-law had also been making rosehip syrup during the same week. He combined it in equal parts with gin and presented us with a bottle as a gift... I think Pam should add this to her list of recommended uses for it!
It's nice to think that we'll be drinking and eating memories of this Autumn well into the coming Winter.
It wasn't difficult to gather a generous colander-full whilst on a local walk.
Once again I turned to Pam Corbin's fabulous Preserves book, and this time thought I would try Rosehip Syrup. Rich in Vitamins A and C, Rosehip Syrup was a staple drink for generations past. During World War Two members of the public were actually paid to collect rosehips for this syrup, in order that the nation's children could be kept healthy.
The recipe is simplicity itself, although does require some forethought as the rosehip pulp needs to be left overnight to drip.
Rosehip Syrup
Makes about 1.5 litres.
500g rosehips, rinsed, stalks removed
650g granulated sugar
Put 800ml water in a pan and bring to the boil.
Mince the rosehips in a food processor, and add them to the pan of water. Cover and bring back to the boil.
Remove the pan from the heat and allow to stand for 15 minutes.
Pour through a scalded muslin or jelly bag and leave to drip for an hour or so.
Set aside the strained juice.
Bring another 800ml of water to the boil, add the rosehip pulp and repeat the boiling process.
Tip the mixture back into the bag/muslin and this time leave to drip overnight.
The next day discard the rosehip pulp (I added it to our compost bin) and combine both lots of strained juice (which should be about 1 litre) in a large pan.
Add the sugar and heat, stirring until dissolved. Boil for 2-3 minutes, then immediately pour into warm sterilised bottles and secure with a screw-cap or cork.
Use within 4 months.
Pam (for I feel like we can be on first-name terms now!) suggests drinking the syrup mixed with hot water - I'd imagine this to be particularly good as an attempt to ward off the inevitable winter cold - or drizzled neat over rice pudding or pancakes. Co-incidentally my brother-in-law had also been making rosehip syrup during the same week. He combined it in equal parts with gin and presented us with a bottle as a gift... I think Pam should add this to her list of recommended uses for it!
It's nice to think that we'll be drinking and eating memories of this Autumn well into the coming Winter.
No, we haven't yet had our first frost! This picture was taken last December.
I love how the rosehips last so long into the Winter.
Saturday, 10 October 2009
Hedgerow Jelly
Any walk through the English countryside during September and October can provide a multitude of treats for the eagle-eyed forager. Forget that, there's no need for eagle-eyes - Autumn's fruits are everywhere! People with apple trees in their gardens have just begun to leave baskets of fruit on their driveways, accompanied by scrawled notices beseeching passers-by to 'Please take some apples!', so of course I have obliged.
However, last weekend there was no need to look for cultivated fruit. A quick cycle-ride along the canal towpath yielded basketfuls of hedgerow treasures which were just perfect for the 'Hedgerow Jelly' recipe I had had my eye on for a while.
We couldn't bear to get rid of these Fruits de l'Ontario baskets!
Fond memories of buying them full of ripe Niagara peaches and grapes...
Rob got carried away with picking blackberries, as you can see.
However, blackberries were not what I was after... I had noticed some crab-apple trees up the towpath, and as the recipe called for half the quantity of fruit to be apples, I thought that these would be more appropriate than the apples I had 'foraged' from people's driveways! I also filled my basket with rosehips and haws (from the hawthorn tree). I knew that rosehips were edible - they were commonly gathered to make a Vitamin C-rich syrup, particularly during wartime last century - but I had never tried using them. However, until recently I was unaware that haws were edible and as there's such a profusion of them this year, it seemed a shame not to try them. Eaten straight from the tree they are uninspiring; slightly mealy and flavourless, but it seems that they have a multitude of potential health benefits, so that seems reason enough to include them in this recipe.
The recipe is, once again, from Pam Corbin's excellent River Cottage Handbook 'Preserves'. This is fast becoming one of my cookery book essentials, and is certainly the book from which I have cooked most recipes over the past few months. Typically, this recipe is gloriously flexible, allowing you to use whatever hedgerow treats you find, but with Pam's own favourite combinations suggested too.
500g crab apples (or apples)
500g mixed hedgerow berries (a combination of 2 or 3 of these is suggested: rosehips, elderberries, haws, bullaces, sloes, damsons, etc)
900g white sugar
Turn the contents into a bowl lined with a scalded muslin cloth, and leave to drip overnight. I tie mine up by the corners and hang it off a clothes-airer with the bowl underneath, which seems to work very effectively, even if it looks a little odd!
The next day measure the juice – you will probably have about 1.2 litres, though this will depend on the berries used. For every 600ml juice allow 450g sugar. Put the juice into a large pan and slowly bring to the boil. Add the sugar as it just comes to the boil and keep stirring until the sugar has dissolved. Then boil rapidly, without stirring, for 9-10 minutes until the setting point is reached. Skim the jelly and pot (in sterilised jars) and seal as quickly as possible. Use within 12 months.
This recipe can easily be halved, which was in fact what I did. As you can see, this particular combination of berries produced a gorgeous clear ruby-red jelly, which almost glows as the Autumn sun shines through it.
The jelly can be spread on toast, or crumpets (to be eaten in front of a roaring fire of course!) but is equally at home used as a condiment with a roast dinner. I have a real fondness for fruity jellies eaten in this way, but I think that's something that you either love or hate. Either way, it's a perfect way to enjoy the loveliness of the new season.
Labels:
autumn,
crab apples,
foraging,
haws,
hawthorn,
hedgerow,
Pam Corbin,
rosehips
Monday, 28 September 2009
Delicious Damsons
Darn this world of full-time work! Suddenly I have far too little time to write my blog. However, I have made an effort to make time for cooking, particularly now we are entering a season full of nature's bounty... I mean of course, lots of free food!
I'm not sure if we are particularly lucky regarding free food in our area - I suspect the profusion of cherries in our vicinity is very fortunate - but I seem to be continually discovering new sources of free fruit. A mere 3 minutes walk down the road from our house for example, I suddenly discover a damson tree, laden with beautiful purple fruit! It is definitely on public land (so no fruit-stealing worries here) and within a few minutes of not-very-arduous picking Rob and I managed to gather a large box full.
Now I wouldn't say I'm sick of jam... but I do now have a cupboard full of it, 5 different varieties in all, and a total of about 10 jars which will take us about a year to eat. So I really wanted to do something different with these damsons. Thankfully inspiration came in the form of my Dad who often makes this wonderful Spiced Damson Sauce which is a perfect accompaniment to meats. We have had it with the Christmas Turkey as an alternative to the traditional cranberry sauce, but it's also perfect with chicken. I'd probably eat it with pork too. I just love fruit-sauces with meats. It's not too sweet, with the tartness provided by the fruit and the vinegar, and the flavours of the spices really shine through, especially the mace. I don't usually like cloves much, but they work so well in this sauce.
Here's the recipe - so incredibly simple as you can see:
2lb / 900g damsons
1lb / 450g demerara sugar
A blade of mace
4 cloves (I threw in a few more than this)
4 peppercorns (Likewise - life's too short to count out peppercorns)
half tsp salt
half pint / 250ml vinegar (malt or wine)
Place all ingredients except the vinegar in a pan and simmer for 15 minutes. (Add 2 tablespoons of water to get it going). Add the vinegar and continue simmering for an hour. Rub the mixture through a coarse sieve, return the pulp to the pan and boil gently for 10 minutes, stirring well so it doesn't catch. Pot and keep for at last 2 weeks before eating.
I made 2 batches of this and discovered - erm, accidentally - with batch 1 that if you forget about timing the final 10-minute boiling and leave it bubbling away for 15-20 minutes, when potted it will set into a firm jelly. Batch 2 was more carefully timed so is a fairly liquid sauce, but I actually prefer the firmer version for use when making sandwiches as it doesn't make the bread soggy. Do as you please.
And it seems as though we're not the only ones who like damsons...
(Careless fruit-picking by Rob there - honestly, you can't get the staff!) And yes, I did wash the fruit before using it!
I'm not sure if we are particularly lucky regarding free food in our area - I suspect the profusion of cherries in our vicinity is very fortunate - but I seem to be continually discovering new sources of free fruit. A mere 3 minutes walk down the road from our house for example, I suddenly discover a damson tree, laden with beautiful purple fruit! It is definitely on public land (so no fruit-stealing worries here) and within a few minutes of not-very-arduous picking Rob and I managed to gather a large box full.
Now I wouldn't say I'm sick of jam... but I do now have a cupboard full of it, 5 different varieties in all, and a total of about 10 jars which will take us about a year to eat. So I really wanted to do something different with these damsons. Thankfully inspiration came in the form of my Dad who often makes this wonderful Spiced Damson Sauce which is a perfect accompaniment to meats. We have had it with the Christmas Turkey as an alternative to the traditional cranberry sauce, but it's also perfect with chicken. I'd probably eat it with pork too. I just love fruit-sauces with meats. It's not too sweet, with the tartness provided by the fruit and the vinegar, and the flavours of the spices really shine through, especially the mace. I don't usually like cloves much, but they work so well in this sauce.
Here's the recipe - so incredibly simple as you can see:
2lb / 900g damsons
1lb / 450g demerara sugar
A blade of mace
4 cloves (I threw in a few more than this)
4 peppercorns (Likewise - life's too short to count out peppercorns)
half tsp salt
half pint / 250ml vinegar (malt or wine)
Place all ingredients except the vinegar in a pan and simmer for 15 minutes. (Add 2 tablespoons of water to get it going). Add the vinegar and continue simmering for an hour. Rub the mixture through a coarse sieve, return the pulp to the pan and boil gently for 10 minutes, stirring well so it doesn't catch. Pot and keep for at last 2 weeks before eating.
I made 2 batches of this and discovered - erm, accidentally - with batch 1 that if you forget about timing the final 10-minute boiling and leave it bubbling away for 15-20 minutes, when potted it will set into a firm jelly. Batch 2 was more carefully timed so is a fairly liquid sauce, but I actually prefer the firmer version for use when making sandwiches as it doesn't make the bread soggy. Do as you please.
And it seems as though we're not the only ones who like damsons...
(Careless fruit-picking by Rob there - honestly, you can't get the staff!) And yes, I did wash the fruit before using it!
Sunday, 6 September 2009
Stolen Treasures
If a tree laden with fruit is growing in someone's garden, but the fruit is hanging over a public footpath, then is it stealing if you pick it? This was the question that flitted through my mind as I hurriedly filled my empty sandwich box with luscious sweet Mirabelle plums on a local walk a few weeks ago.
I had done a cursory check into said garden, and established that no one was home, and salved my conscience by telling myself that there were literally thousands of plums on this tree... but I couldn't help but feel a little guilty about taking them.
However, once home I put all guilt aside and set to turning these golden beauties into jam.
Mirabelles are a small variety of plum - the perfect size for stoning with a cherry-pitter, and much less messy to do so! They were perfectly ripe so were stoned with ease, and were soon bubbling away with some sugar and water.
The recipe I used - this one, from the fabulous River Cottage 'Preserves' handbook by Pam Corbin - instructed one to crack some of the plum stones to extract the kernels and give the jam a slight almondy flavour. But this sounded dangerous (I had visions of trying to bash them open with a hammer...) so instead, just as setting point was reached I added a scant teaspoon of almond essence. This has provided a wonderful addition to the fruitiness of the jam - the almond flavour is subtle, but adds a real depth to the preserve.
As you can see, I upped the almond level in one of my three jars by stirring through a generous handful of slivered almonds, which should provide an interesting texture. I had never added nuts to a jam, but I have my fingers crossed that it will be a successful experiment.
A quick check through my kitchen cupboard has revealed that I now have 5 different varieties of home-made jam, all made in recent months. With blackberries still to come, I fear that there will be even more by the time 2009 ends. We don't even eat that much jam... I think we'll just have to make the clotted cream tea a weekly occurance!
I had done a cursory check into said garden, and established that no one was home, and salved my conscience by telling myself that there were literally thousands of plums on this tree... but I couldn't help but feel a little guilty about taking them.
However, once home I put all guilt aside and set to turning these golden beauties into jam.
Mirabelles are a small variety of plum - the perfect size for stoning with a cherry-pitter, and much less messy to do so! They were perfectly ripe so were stoned with ease, and were soon bubbling away with some sugar and water.
The recipe I used - this one, from the fabulous River Cottage 'Preserves' handbook by Pam Corbin - instructed one to crack some of the plum stones to extract the kernels and give the jam a slight almondy flavour. But this sounded dangerous (I had visions of trying to bash them open with a hammer...) so instead, just as setting point was reached I added a scant teaspoon of almond essence. This has provided a wonderful addition to the fruitiness of the jam - the almond flavour is subtle, but adds a real depth to the preserve.
As you can see, I upped the almond level in one of my three jars by stirring through a generous handful of slivered almonds, which should provide an interesting texture. I had never added nuts to a jam, but I have my fingers crossed that it will be a successful experiment.
A quick check through my kitchen cupboard has revealed that I now have 5 different varieties of home-made jam, all made in recent months. With blackberries still to come, I fear that there will be even more by the time 2009 ends. We don't even eat that much jam... I think we'll just have to make the clotted cream tea a weekly occurance!
Sunday, 30 August 2009
Ruby Food
Part of our recent Summer holiday was spent in Devon, staying with my parents. It's an area that we both love, and it's great to have a base down there, with lots of family in the vicinity. This year was also a special one, in that it was both my parents', and my aunt and uncle's Ruby Wedding Anniversaries. 40 years - impressive! The Summer of '69 must have been a busy one for my grandparents.
I began thinking about a present as soon as heard that there was to be a family party, and soon came up with the idea of a red-themed hamper. Sometimes I get struck by a wave of anti-consumerism, and horror at the sheer amount of 'stuff' that people seem to own nowadays (myself most definitely included), and luckily this feeling ties in neatly with the idea that home-made and edible gifts are lovely to receive.
A quick browse through my many 'preserves' recipe books provided inspiration aplenty, but I thought I'd share one of the most successful projects with you: Ruby Fizz. Earlier this Summer we had great success with making Elderflower 'Champagne', using this recipe, or something quite like it. To be honest, there are a multitude of different recipes out there, each with varying quantities of elderflower, sugar, water, etc, so take your pick! We soon got to thinking that we could use the same principle to create any kind of alcoholic (and it is alcoholic!) fruit fizz. As we had a basket of the wild plums that I mentioned previously in this post, and a bag of foraged blackberries in the freezer from last Autumn, this seemed the perfect place to start.
I began thinking about a present as soon as heard that there was to be a family party, and soon came up with the idea of a red-themed hamper. Sometimes I get struck by a wave of anti-consumerism, and horror at the sheer amount of 'stuff' that people seem to own nowadays (myself most definitely included), and luckily this feeling ties in neatly with the idea that home-made and edible gifts are lovely to receive.
A quick browse through my many 'preserves' recipe books provided inspiration aplenty, but I thought I'd share one of the most successful projects with you: Ruby Fizz. Earlier this Summer we had great success with making Elderflower 'Champagne', using this recipe, or something quite like it. To be honest, there are a multitude of different recipes out there, each with varying quantities of elderflower, sugar, water, etc, so take your pick! We soon got to thinking that we could use the same principle to create any kind of alcoholic (and it is alcoholic!) fruit fizz. As we had a basket of the wild plums that I mentioned previously in this post, and a bag of foraged blackberries in the freezer from last Autumn, this seemed the perfect place to start.
Simply crush the fruit - enough to cover the base of a clean washing-up bowl - gently with a potato masher, and add about 500g of sugar. This will seem a lot, but the fermentation process 'eats' some of the sugar, so the finished product shouldn't be too sickly-sweet. Pour on 1 litre of boiling water and stir to dissolve the sugar, then add 2 litres of cold water. This should create the ideal temperature to activate the yeast - add a pinch of dried yeast now. Stir, cover with a clean tea towel, and wait... After a day or two, you should begin to see signs of the fermentation starting. As you can see from the first photo, ours looked rather sinister, like a bubbling swamp! A quick taste will confirm that it is beginning to fizz. After 3 days, scoop out the fruit (pic 2) and then strain into PLASTIC bottles (can't emphasise this enough - read what can happen if you try to use glass), leaving a few cm free at the top. Then leave the bottles for at least a week. Of course, plastic bottles can explode too, so every day I opened the lids very slightly just to let the excess gas escape. You will hear a very satisfying fizzzzzzzzz when you do this. In fact Rob and I began almost racing eachother downstairs in the mornings for the privilege of being the one to do this daily job! You'll see the bottles begin to bulge ominously if you don't do this every day, so be sure not to go away on holiday at this point.
Et voila, Ruby Fizz ready for the hamper. We have also kept a couple of bottles of this. It's several weeks old now and has 'aged' well. It's definitely worth chilling it thoroughly before serving as it remains very 'lively' when opened!
So the fizz went into the hamper alongside the Cherry Jam, Rhubarb and Strawberry Jam, Cherry Ratafia (liqueur) and Raspberry Vinegar (all homemade, and mostly with foraged fruit), and the Ruby Port, Lindt Chocolates and bar of Bourneville Chocolate (bought, obviously) to complete the gift.
Strawberry Cheesecake Cupcakes were made for the afternoon tea, 'dressed' most beautifully once again by some gorgeous Cupcake Wrappers made by the wonderful Dani - check out the website here. I asked Dani if she had suitable wrappers for a Ruby Wedding and she went to the trouble of ordering some new papers, and sending me several samples to choose from. Now that's customer service!
The cupcakes were filled with macerated strawberries, and topped with cream cheese icing, much as I did with the cherry ones earlier in the Summer.
The party was a lovely occasion - many congratulations to Jenny and Bob, and Nick and Gwen!
Labels:
blackberries,
champagne,
cupcake wrappers,
cupcakes,
foraging,
hamper,
plums,
Ruby wedding
Subscribe to:
Posts (Atom)