Monday, 11 November 2013

More Apple Jellies

Back to the long-neglected blog! 

As Autumn turns cold and soggy, I only have to look at my now-full preserves shelf to feel cheered. 


This has been an incredible year for all kinds of fruit.  Our Bramley tree which last year produced a grand total of 3 apples, has this year excelled itself and we have had more than we know what to do with.  Of course we've made great efforts to use what we can in cakes, puddings and chutneys, and I've enjoyed experimenting with a couple of new jams and jellies, as well as the 'usuals' (apple chilli, apple rosemary, and apple mint, instructions for which can be found earlier in this blog).


First off, Spiced Apple Butter.  Apple Butter is a very North American treat, although I don't think I ever actually ate it when I lived in Canada.  Slightly confusingly, it contains no actual butter, but is a long-cooked apple puree, often with spices such as cinnamon added.  I decided to try a recipe that used my rather neglected slow-cooker, and the results were delicious, making the entire house smell like Christmas! 


 I've put it all into sterilised jars ready to use in some festive baking.  I have of course sampled some already and it's great on toast.

The recipe can be found here, on the Frugal Foodie Mama website.

Next was Apple Quince Jelly.  I adore quinces, with their heady, almost floral scent, but they seem very difficult to come by in the shops.  This year I was lucky and managed to pick up a few windfalls locally. 


The flavour is intense so you actually don't need many to produce a beautiful preserve, bulked up of course with some apples!  Just look at this gorgeous colour, and it tastes wonderful too.  It's currently my breakfast toast-topping of choice.


I found the recipe here, on this nice foodie blog.

Finally, Apple Sloe Jelly.  The hedgerows are laden with sloes this year.  I have never used them for anything, save for drinking my father's homemade Sloe Gin!  On the tree they are mean fruit, small, hard and lip-puckeringly sour, but I felt sure that there must be potential for using them in something other than liqueur. 


A quick google brought me to this recipe, on The Cottage Smallholder (which incidentally is a fabulous blog, bursting with useful recipes).  Like the Quince jelly, this is a luscious colour, dark ruby red and gloriously clear (never squeeze the jelly bag when you're straining the fruit, otherwise your jelly will be cloudy).  I had slightly too much of this to fit in the available jars, so I'm currently working my way through a bowl of it on my toast.  (I eat a lot of toast!).  It's also  popular with the youngest member of the household.  


 I turn my back for a second...

The recipe indicates that this is a good jelly to eat with meats, but personally I think it's a little too sweet for that.  There's a lot of sugar in there (and I used a little less than the 1.5lb per pint stipulated as I ran out of sugar), so the sourness of the sloes has disappeared in my batch.  This makes it perfect as a jam, but probably not so suitable for eating with your sausages.  If I were to make it again (and I will) I think I would use 1lb of sugar per pint of juice, as you do usually when making jellies.


So all in all a successful year of preserving.  Just in case I forget to blog it properly, I also experimented with a new chutney, one that includes tomatoes.  The recipe is here, on the BBC Good Food website.  I used red pepper instead of green, but otherwise the recipe was unchanged by me.  It's still maturing in jars so I have yet to taste it, but I'm looking forward to it!

Tuesday, 2 July 2013

Banana Breakfast Cakes

... or 'Wakey Wakey Cakey' as they're cutely named on the website where I discovered this recipe!

Whilst my 12 month old baby-led-weaner enjoys his food and remains a relatively adventurous eater, breakfast is a bit of a non-event for him.  Our co-sleeping breastfeeding relationship means that he spends much of the night snacking at 'the best restaurant in town' so when we get up at about 8am he is rarely hungry.  He might nibble on the odd piece of cereal, but is generally happy not to bother.  However by mid-morning he is definitely ready for some food, a potentially inconvenient time as we are usually out and about by then.

He is a huge fan of the 'Goodies' baby oaty bars made by Organix (and I am too, they're delicious!), but while I appreciate the convenience of these pre-packaged baby/toddler foods, I am always more inclined to try and make my own versions.  I did experiment with my own oaty bar recipe, but so far have only managed to make bars that are crumbly rather than chewy (I will continue to experiment though, so watch this space!), but I wanted a portable snack that wouldn't make quite so much mess.

Some food-forum advice, plus some internet searching brought me to this recipe on the Baby Led Weaning website, and I have now made 2 batches with slight variations, both well received.

The basic idea is this:

Mash up one Weetabix, one ripe banana, 100ml of milk and 20g of cornflakes.  Add a second Weetabix and stir until you have a 'cement-like' mixture (which sounds so appealing!).  Then divide into 6 greased fairy-cake trays and bake at 190 degrees for approximately 30 minutes until firm and beginning to brown.

I have taken this very much as a template and played with it somewhat.  We didn't have cornflakes in the house so I used oats instead (I like to use oats for their slow-release energy).  I also didn't have full-cream milk so used a semi-skimmed plus a large dash of double cream (to make sure he gets enough fat).  For the first batch I added some very ripe strawberries mashed in with the bananas, and in the second batch I used extra banana as I had 2 that were turning black, and also threw in a handful of raisins.  With both batches I just added some extra oats to get what I thought was the right consistency.  I also used a very shallow jam-tart tray so ended up with 12 'discs' of cake rather than 6, and therefore they only needed about 20 minutes' cooking.

They turn out as a slightly chewy, cakey creation...  I'm not entirely sure that I'd recommend anyone without small children to make them for adult consumption, but they're not bad to eat, (although obviously I'd rather have some real cake!).  I like the fact that they're basically what you might have for breakfast; cereal, milk and fruit.  Weetabix does contain some sugar, but you are not adding any extra, so I think they're generally a 'good' option for a toddler snack.  They hold more-or-less together without crumbling messily into thousands of pieces, but are still soft enough for gumming.


And despite the serious face, this one-year-old thinks they're good too!


Monday, 1 July 2013

Epic Roast Chicken Salad

I belong to a couple of 'foodie' groups on Facebook, and I love to look at other people's food photos and hear what they've been cooking.  I often find that this inspires me to make something similar, and this is exactly what happened last week.  A friend posted that she had made and loved Jamie Oliver's Epic Roast Chicken Salad, and as the weather was set fair (gloriously sunny actually!) an epic salad sounded just the thing!  The recipe was from a Jamie book that I don't have, and I couldn't seem to find the exact recipe online.  However, I did find a lovely blog by a lady called Elspeth who had also created a fabulous chicken salad, based on the Jamie recipe.  I ended up using this as a basis (thanks Elspeth!) but made a few changes myself.


I actually made this using chicken leftovers as we had roasted a large chicken the night before.  I had both the breasts left, so began the layering of the salad by tearing these up, cold, and putting them on a large plate. 

I topped the chicken with the roasted tomato layer.  I had roasted these simply in a slug of olive oil with a handful of garlic cloves, and laid slices of streaky bacon over the top so that the bacon fat would flavour the tomatoes.  I also laid the leftover chicken skin on top of the tomatoes to re-crisp.  For the last 10 minutes of the tomato roasting time, I tore up a small ciabatta loaf and tossed it into the tomato pan, letting it soak up all the tomatoey and bacony juices before going back into the oven to crisp up.  This glorious pan-full was tipped over the chicken, breaking up the now-crispy bacon and chicken skin as I did so.

Some simply steamed green beans were added, hot, to the top of the heap, before the whole lot was dressed with the mix of wholegrain mustard, fresh mint, lemon juice (I subbed this for cider vinegar) and olive oil described in Elspeth's recipe.  

To finish I scattered over the toasted salted pumpkin seeds that I had prepared earlier.

This was a fabulous supper, and was also enough for me to have leftovers for lunch the following day.  I think it's important to eat the ciabatta croutons while they are still warm and crispy, so I made myself some fresh ones to go with the leftovers. 

I don't know how far away this is from the 'original' Jamie Oliver recipe, but to be honest I think it's a formula that can be successfully adapted according to the ingredients you have to hand.  Some chopped spring onions would be a nice addition for example, and perhaps fresh basil in place of the mint?  But definitely a recipe that I will try again.

Lemon and Elderflower Self-Saucing Pudding

I've recently started borrowing lots of recipe books from our local library.  Our cookbook shelf is full, and I have far too many books that I haven't cooked enough from, so I'm trying a) not to buy any more, and b) to use the ones I've already got.  But sometimes I feel the 'need' for a fresh crop of recipes to inspire me, so using the library is a perfect option.

Last week I picked up a really nice little book from the 'My Kitchen Table' series entitled '100 Foolproof Suppers' by Audrey-Hepburn-hairalike Gizzi Erskine.  Lots of my foodie friends had been raving about her recipes recently so I was keen to see what all the fuss was about.


First impression?  Brilliant!  I found myself jotting down a long list of recipes that I'd like to try, which is always a great sign.

First off was the Nasi Goreng, or fried rice.  We had been longing to try to recreate this at home as it was one of our very favourite dishes in Brunei.  I don't actually think it's possible to replicate this exactly without a fierce gas-flame and a well-seasoned wok, but this recipe worked  fantastically well with our crappy electric hob and a non-stick frying pan.  We've copied out the recipe to keep, but if you fancy trying it it's online in the Amazon preview of this book

Tomorrow I'm trying her Fish Goujons with Mushy Peas and Sweet Potato Wedges, and next week I'm having a go at the Aubergine, Artichoke and Lamb Bolognese (we had roast lamb at the weekend so I'm giving it a few days before we have lamb again)...  but what I REALLY want to blog about is the most amazing pudding which I made last night:

The recipe is actually entitled Lemon and Passion Fruit Self-Saucing Pudding, but my search for passion fruit juice proved, er, fruitless.  I did find a carton of it, but as it was only about 10% passion fruit juice, I thought it wasn't quite right.  Instead I decided to replace the passion fruit juice with Elderflower Cordial.  We've just made a batch of it, as we do most years, and as it's made with lemons I thought it would complement the lemon flavour of the pudding very well.  And, well, I was right; it's perfect.

The recipe can be found on the My Kitchen Table website - just follow this link.  I'm certain that the passion fruit version would be fabulous, but I can whole-heartedly recommend the elderflower.  The only slight issue that I had was that after 45 minutes' cooking the pudding looked perfectly done, with the sponge topping lightly browned.  However, when I dug beneath the surface the custardy sauce was still quite liquid, rather than the texture of lemon curd, as it should have been.  Too impatient to put the whole pudding back in the oven, we simply spooned out portions into bowls and gave each one a minute in the microwave on high, and bingo, the sauce thickened beautifully.


Not exactly the most photogenic of desserts perhaps, but who cares.  We served it with lashings of double cream.  Thanks Gizzi.

Edit:  Having polished off the final portion of this pudding last night, my husband announced that it was lovely, but 'a bit too sweet'.  He probably has a point as the elderflower cordial is very sugary. Perhaps next time I'll cut the sugar in the pudding mix down (by a couple of tablespoons?) to compensate for the addition of the cordial.

Friday, 7 June 2013

Pasteis de Nata

In March this year we spent a week in Lisbon, the beautiful capital of Portugal.  It was our first trip abroad with Ted, and an all-round success, we loved it.  True to form a big part of the holiday's success was the food involved!  We were staying in a self-catering apartment (for ease with a baby) so cooked for ourselves every evening.  I don't think we managed to eat a huge amount of 'traditional' Portuguese food, as Rob isn't really a seafood fan, and neither of us fancied tackling one of the slabs of salt-cod we saw for sale everywhere, but one typical local delight that we did eat rather a lot of was Pasteis de Nata, Portuguese custard tarts.


We would buy a 4-pack of these every day from the local supermarket...  one each for morning coffee, one each for afternoon tea!


We also took every opportunity to have these when out and about in the city.  This was a very famous cafe in Belem which specialised in these pastries.


Pasteis de Nata are a far cry from the custard tarts that we know and love in England.  English custard tarts are made with short, sweet pastry, sprinkled with nutmeg, then cooked slowly to set the eggy custard to a gentle wobble.  Portuguese custard tarts are made with flaky puff pastry, and blasted at super-high heat to puff the pastry and scorch the custard within.  I'd heard that it was tricky to recreate these delights at home as you can't really get a domestic oven to the requisite heat, but I thought I'd give them a try anyway.

I have a couple of Facebook friends who are also big fans of Pasteis de Nata (hi Helen and Tina!), and stumbled upon a discussion about them in which a Portuguese friend of Helen's posted a link to the following recipe on Leite's Culinaria.  I figured that as she was Portuguese this was as good a recommendation as any, so this is what I used.

*Lazy Cook Alert*...  I couldn't be bothered to make my own puff pastry (hangs head in shame) so used a ready-made sheet of it.  I'm actually glad that I did as making the custard was quite a palaver, requiring sugar syrup, a sugar thermometer, and rather vague instructions such as 'stir for a minute until very warm but not hot' (note: I erred on the side of cool, not wishing to scramble the eggs); and let's face it, my baking is usually time-restricted to fit in with Ted's midday nap.  I just wouldn't have had time to make the pastry too.  If you choose to have a go at this recipe, bear in mind that for this amount of custard you will need TWO sheets of puff pastry.  I only had one, so now have half the custard in a jug in the fridge waiting for me to buy another sheet to use it up.  So either buy two, or halve the custard recipe.


You create the signature 'swirly' base of the tarts by rolling the pastry into a log, then cutting sections and squidging them into the holes of the muffin tin.  This bit was fun, but take it from me, you need to grease the tin first...  oops!


It was NOT easy to extract the tarts from the tin.  So much for non-stick!


 Lots of soaking required.

 The recipe states that they need to cook for 8-9 minutes, but I found that after this time the pastry was still uncooked so I put them in for another 3 minutes.  I then removed them from the tin (with some difficulty!) and placed the tarts back into the hot oven in order to crisp up the bases and sides a little more.  Perhaps you wouldn't need to do this if your oven was a bit hotter, but mine only goes up to 250 degrees, not the 290 the recipe requires.

And the results?  A little rustic perhaps, but pretty darn authentic as far as we are concerned!   Being mini-muffin-sized it's dangerously easy to eat several at one sitting.  As we found in Lisbon, these are at their nicest when warmed slightly in the oven before eating, and you can add an optional sprinkling of cinnamon or icing sugar if you choose.


Swirly base (not a soggy bottom in sight!)

I'll definitely try these again in the future, greasing the tin next time, and also perhaps filling them slightly less full to avoid quite so much overflow.  This half-recipe made 23 mini tarts, but I will cut the next sheet of puff pastry into only 20 (the full recipes says it makes 40) as with some of my tarts the pastry was a little thin. 

Delicioso!

Thursday, 2 May 2013

Savoury Flapjacks

Did you read the title of this post and think 'YUK'?  I have to admit that I did when I saw a recipe for them in a book recently.  When I think of flapjacks I think of sweet, chewy, syrupy, oaty treats...  but a savoury version?!  Just wrong.

Well I can only urge you to put your prejudices aside and read on. 

These flapjacks might better be called 'Cheesy Flapjacks' (does that sound any more appetising?!) and the recipe is taken from the brilliant 'Baby Led Weaning Cookbook' by Gill Rapley.  I tend to make a half-sized batch of these, but as Ted is beginning to eat more and more (and I love to snack on them too) I think I'll start making the full amount.  They are really useful portable snacks for babies, but if you don't have children to feed then please don't ignore this recipe, they're delicious for all ages!

Savoury Flapjacks

100g butter ( preferably unsalted if cooking for young children)
300g porridge oats
350g grated cheese (I usually use mature cheddar, but used 50% red leicester in my most recent batch which gave them an attractive orangey colour)
2 beaten eggs
200-300g of one of any of the following (grated): carrot, courgette red onion, sweet potato, swede or parsnip (the veg is an optional addition, but I usually grate in whatever veg I have in the fridge, just to make them extra-nutritious).

Preheat oven to 180 and lightly grease a Swiss roll tin (for a half-batch I use my 20x20cm silicon pan).

Melt butter in a pan over a low heat. Take off the heat and combine all ingredients in the pan, mixing well.

Press down into the tin using the back of a spoon or fork. Bake for 20 minutes until golden brown (I usually find they need an extra 5-10 minutes, but that might just be my oven, or my own personal preference).


Allow to cool for 5 minutes then cut into slices and turn out onto a wire rack (although if I've cooked mine in a silicon tray I let them cool in that before turning them out onto a wooden board and cutting them into slices).


And my harshest food critic?  He approves!  Success.


Nettle Soup, take 2

One of the exciting things about being back in the UK is being able to go and forage once again!  We did try this in Brunei, managing to gather some mangos before the local monkeys got to them, but foraging in the jungle was always a little risky in my mind, so we didn't really dare.

But now is the season for one of the most satisfying foraging of the year, nettles.  We have a field ajoining our garden than is currently full of young nettles, and as they need clearing anyway we thought we'd kill the proverbial two birds with one stone and eat some of the ones we cleared.  OK, I say 'we', but this was Rob's job - he picked, washed and cooked them with delicious results.


We had made nettle soup before (as blogged about previously) but this time Rob used a Hugh Fearnley-Whittingstall recipe, found on guardian online.  Personally I wouldn't have bothered with a recipe, but he wanted to so I didn't interfere!

It was delicious anyway.  The nettles just taste 'green', but healthy and nutritious, rather like spinach I suppose.  Ted enjoyed it too!


Rhubarb and Custard Cake

I realised with a jolt last week that I hadn't looked at Pinterest for weeks, months actually.  For someone who has been known to fritter away hours of the day 'pinning' fabulous cooking/decorating/craft/clothing ideas, this is quite a change... But I've decided that I can only maintain one internet addiction during Ted's nap-times, and Facebook has won that competition!  However, some 'pins' have stuck in my mind, and when I saw some lovely pink stalks of Hampshire rhubarb in the shops last week, I had a sudden recollection of a beautiful looking recipe that I had seen and pinned, so I bought them.

And here it is:


Not only does the cake look gorgeous, I love the way that this blogger (eat, little bird) has presented it, so appealing.

Anyway, I set about making it as soon as I got home.  The cake batter is extremely thick but I suppose that this helps to 'support' the thick layer of custard that you put into the middle.  I also stewed the rhubarb that I had leftover from patterning the top of the cake, and put a fruity layer in the pan on top of the custard.  I ended up using my dampened hands to mould the top layer of cake batter so I could just place it in the tin on top of the custard and rhubarb. 


It looked beautiful before baking...  but not quite so attractive afterwards!!


However, as we all know, it's the taste that counts, and this tasted...  OK.  If I made it again I'd definitely make a couple of changes: 

- Add an extra egg to the cake batter.  It's a very dense cake and I think some more liquid would loosen it up a bit and make the cake a bit lighter. 

- Not make the custard filling too thick.  I made the rookie error of using a giant tablespoon to measure out the custard powder when I was making the filling.  I should have used a proper 15ml measure.  My fault.

- Don't over-bake it.  Again, my fault, but in my defence it's quite hard to tell if it's done as a cake-tester will inevitably hit the custard filling and come up looking like it has uncooked batter on it.

My extra rhubarb layer was a good plan, as the sticks on top just aren't enough - but I love rhubarb!

I have just seen a variation of this cake on Facebook, where apple has been used in place of the rhubarb, with excellent results.  I think I will definitely try that in the Autumn when we are always awash with apples.

I'm glad I tried it, but will refine it a little when I bake it again.

Monday, 29 April 2013

Brownies and Blondies - Rachel Allen

I sometimes feel that I shouldn't bake too much as, you know, I'd only eat it all myself...  But I have recently solved that problem by rediscovering the satisfying glow caused by the giving of cake as a gift, specifically to 2 friends who have recently had babies.  After all, what's a more welcome gift in that sleep-deprived and mind-numbingly-exhausting time than cake?!  Not a cake that you need to find a knife to cut and plates on which to serve it - no, all too much to deal with when you have a newborn baby - you need a cake that you can grab, ready cut, from the bag, box or tin in which it is presented.  Brownies seemed to me to fulfil that brief.

A few months ago I bought 'Cake' by Rachel Allen.  It's a lovely book with many recipes that I have bookmarked as 'must makes'; my only criticism is that I wish there were pictures to accompany every recipe.  However, I'm willing to forgive that as every cake I have made from it so far has been good.  Really good. 

With a bunch of bananas quietly getting blacker by the day in my fruit bowl, I was quickly drawn to the recipe for Banoffee Blondies.  This requires the extra step of making an almond praline (just melting sugar in a pan with the almonds, then tipping it onto a tray to cool before blitzing it to rubble in a food processor) but believe me, it's an extra step well worth taking; the nutty crunch that results provides a fantastic texture within the moist cake.  I also, purposely, didn't completely melt the white chocolate so there were some chunks remaining within the mixture. 

The recipe can be found here, although to be ever-so-slightly smug, I can't help but feel that mine look a lot nicer than the ones in the link.  To me they look too dry and cakey, whereas mine had the requisite 'squidge' that any blondie or brownie worth its salt should have.


Next on my list was Cheesecake Brownies.  This isn't a new idea, but a cream-cheese layer swirled onto the top of a brownie mix makes a classic combination.  I have found previous attempts at this idea tricky to 'swirl', as the two different batters can be of different consistencies, but I had no such problem with this recipe.  Mine didn't look quite as artistic as the ones in the book, but they tasted great.  I love the tang of the cream cheese with the sweetness of the brownie.  Again, these turned out dense and squidgy, just perfect.  The recipe can be found here.  


I was really pleased to find two recipes in one week that I could mentally bookmark as 'keepers', I'll definitely be making both again.  Next however on my list from this book is (a request from my husband) Peanut Butter Brownies... watch this space!

Wednesday, 6 February 2013

Baby Led Weaning

You know when other parents see you with a new baby and say 'make the most of it, time goes by so fast'?  Well I've realised something:   They're right.   Darn right, time with a baby just flies by.  7 and a half months ago my son was a squawking chicken-legged little bundle with a permanently baffled expression, but now he's a smiling, burbling, bouncing, giggling, chubby ball of excitement and energy.  And one with an increasingly large appetite.

6 weeks ago we started giving him solid foods following the Baby-Led Weaning (BLW) method.  This a relatively new philosophy regarding introducing solid food to babies.  In the past it was recommended to start on solids at 4 months, and begin with spoon-feeding smooth purees, but the latest recommendations are to wait - if you can - until approximately 6 months old.  Babies should also be showing signs of 'readiness' for solid food:  Sitting up more or less unaided, reaching for food, showing an interest when others are eating.  By this stage babies' guts are more ready to tolerate a wide variety of foods, so there is no need to introduce new foods slowly.  There's loads more information on this amazing website, so I won't repeat it all here, but the premise is simple:  Let your babies feed themselves.


To start the process we simply began to offer Ted some soft foods in easily manageable 'stick' shapes.  I think his first 'meal' was roasted butternut squash.  He really enjoyed exploring this new texture, and inevitably some of it made its way to his mouth.  This is not unusual, most things in my house now seem to be covered in baby-dribble as he goes through his oral-fixation phase, but it was hilarious to see his *OMG* expressions when he first discovered his sense of taste.  Some foods seemed to elicit expressions of horror (see below for first reaction to banana!) but as he always kept going back for more I can only assume that he didn't find it as vile as his face would suggest.


At first he really didn't seem to be ingesting much of the food I presented him with, but I've learned that there's no need to worry.  I repeat to myself the mantra that 'food before one is just for fun' and just let him enjoy himself.  Children get all the nutrition they need until the age of about 1 from milk, be it breast or formula, and solid food is really just a top-up.  So no, I don't really know how much he is eating, even now, but I do trust that he is eating as much as he wants and needs.  This amount may be different every day, but that's OK.  If he eats less solid food one day he'll make up for it with an extra milk feed from me.

I have at times attempted to spoon-feed Ted, but he's having none of it, grabbing the spoon from my hand, or pushing it away from his face.  I'm so glad that I'm not trying to feed him this way, I think it would make mealtimes a battleground for us; I'm sure many babies will happily be fed by their parents, but Ted is clearly asserting his independence already...


At the moment spoons are actually too much of a distraction from the business of eating - they're such fun to play with/chew/bash on the tray/throw onto the floor - so I have temporarily given up offering them to him, preferring instead to just put the food onto his highchair tray and let him explore.  I'll try loading up spoons again some other time, but for now hands seem to do the job just fine.


At first he would grab everything in his fist, so the stick-shapes were essential so that he could chew on the bit sticking out of his fist, but it's been incredible to see how his food-handling skills have improved over the last few weeks.  He's beginning to develop a 'pincer-grip' which allows him to pick up quite small things like halved blueberries (I squish them in half so they are less of a choking hazard).  He's also able to deal with quite slippery stuff such as pieces of avocado, and 'sticks' of banana (easier to handle than slices).


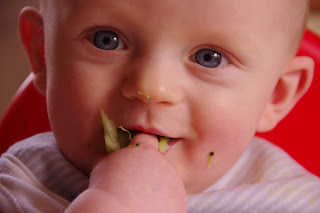
 I love watching the concentration on his face when he sits down to a meal!  He genuinely seems to love his food and mealtimes can easily take anywhere between 30 minutes and an hour.


Some people express reservations about this method of weaning, most often that the baby might choke.  Of course this is a risk, but I think it's a small one as babies naturally gag - to push the food out of their mouths - if they are in danger of choking.  You just need to think carefully about what you give them.  Apple can be a choking risk as it can break off in hard chunks, so instead I grate raw apple for him.  Small spherical objects could also get wedged into a little throat, so as I mentioned earlier blueberries get squidged in half.  Soft bread can get stuck to the roof of baby's mouth causing distress, so toast or crusts are easier for them to deal with.  Even babies that are more traditionally weaned on smooth purees need to learn to deal with lumps and chunks of food sometime, so why not let them learn to deal with them straight away?  Of course some basic first-aid knowledge is important so that you know what to do if you do see your child choking, but surely that's important whatever weaning method you follow?  Babies put plenty of other things in their mouths!  It goes without saying that I never leave him unattended with food...  but at this age you can't really leave them unattended whatever they are doing (except when they're sleeping!)


At the moment 75% of Ted's diet is fruit and vegetables, but I also offer him pieces of lots of other foods, usually just what we ourselves are eating.  He has recently enjoyed pork casserole and roasted tomato pasta, and has tackled even strong-flavoured foods such as mackerel pate and olives (in a beef stew) with great enthusiasm.  A far cry from the bland baby-rice-style foods so often marketed for babies.


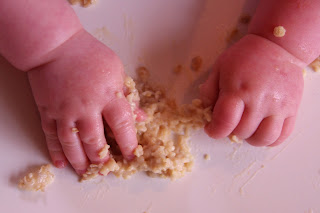
As you'll see from the photos it's messy...  but is it any messier than spoonfeeding purees?  I don't suppose so.  I spread a shower curtain on the floor underneath his highchair, either put a bib on him or know that I'll be putting his top in the washing machine straight after the meal, and just let him get on with it.


I know that 'traditional' weaning works well for many people, but I'm in no doubt that BLW is the right way for us.  For me it just seems logical - I wouldn't want to feed Ted anything that I wouldn't eat myself.  So beef stew is good, beef stew reduced to slop in a blender...  not so appetising.  Food is about so much more than just taste; it's how it looks, how different elements of a meal are different colours, different textures, feel different in your mouth (or hands!).  And as I personally like to put my own food into my mouth, it only seems right that I let Ted do the same.


As the child of 2 parents who love food, cooking and eating, I'd like to hope that he has a good chance of becoming a child who enjoys his food too.  I don't think BLW is a magic answer to avoiding having a fussy child later in life, but I do hope that we are laying the foundations of a lifelong love of food.  He's certainly making a good start!


Sunday, 6 January 2013

Brioche Bread and Butter Pudding

I adore Bread and Butter Pudding, it's such a comforting dish, especially when the weather is cold.  It's a dish that's simple to make, with many possible variations.  Delia Smith's chocolate version is a particular favourite of mine.  When we were staying at my parents' over Christmas my mum had come up with yet another version that is equally delicious, and even simpler than the original - using Brioche rolls.  Because Brioche is so buttery you don't need to faff about buttering the bread, so it's very quick and easy to throw together. 

The Brioche rolls I buy come from Lidl.  Each 350g pack contains 10 rolls which will make a large pudding suitable for 6-8 people.  If I'm just making it for the 2 of us I'll just use 5 rolls and we get extra-large portions!  I'll give the recipe using 10 rolls, but of course it's easily halved:


Brioche Bread and Butter Pudding

350g pack of Brioche rolls
4 eggs
50g caster sugar
700ml milk
100ml double cream
1 tsp vanilla extract (or simply use vanilla sugar instead of caster)
100g raisins or sultanas, or choose another fruit - I like to use fresh blueberries
Optional - sprinkling of cinnamon or nutmeg

Cut or tear the rolls into 4 and arrange in a large ovenproof dish.  Scatter the fruit over the top.


In a separate bowl whisk the eggs, then stir in the milk, cream, sugar and vanilla.  Pour this mixture over the brioche and leave to soak in for at least an hour.


Bake the pudding at 180 degrees C (350 degrees F) for 40-45 minutes until the top is beginning to turn golden brown and the egg-custard is softly set.  The rolls puff up quite dramatically while cooking but sink a little when cooling. 

You can serve this straight from the oven, but I prefer it warm so like to leave it half an hour or so before eating.  Serve with cream.